
Polarity Inverter Installation: The Complete Site Guide
September 8, 2026
Diversify your business as a building tradesperson
September 28, 2026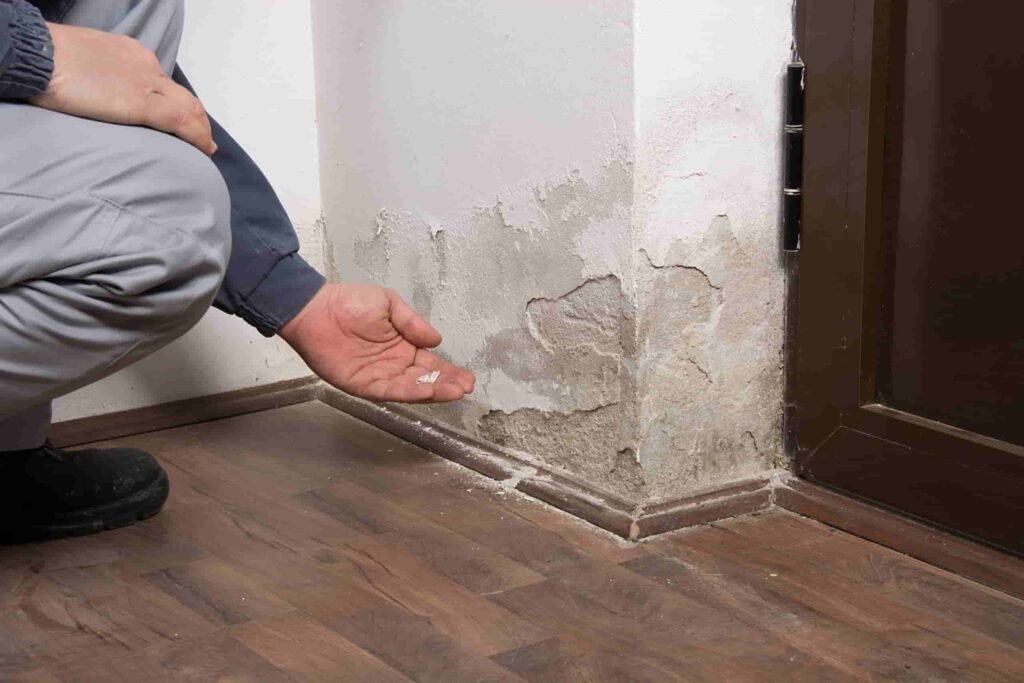
Renovating a damp house without treating the water in the walls means handing over new finishes on a surface that will keep loading up. For a renovation firm or a general building contractor, the rule fits in one sentence: diagnose the source of the damp before the works programme, start the rising damp treatment first, and leave the finishes at the base of the walls until last. In between, indeed, every trade needs to know its instructions.
Renovating a damp house: what the damp damages, trade by trade
When you renovate an old house from top to bottom, damp rarely touches just one trade. It ends up reaching almost all of them, often after handover:
- plasterboard: boards swelling at the base, stud walls growing mould on the side facing the wall;
- paintwork: blistering, flaking and white marks on walls that were only just finished;
- interior joinery: timber skirting boards warping, flooring moving along the walls;
- tiling: grout darkening, tiles bonded onto a base that no longer dries out;
- render: patches, for example, that turn powdery and come away at the bottom.
The homeowner doesn’t separate the plasterer from the painter: for them, indeed, the renovation has failed, and it’s the firm that ran the job who gets the call. To explain the mechanism up front: ATE devices, a professional solution for rising damp. On older properties in particular, this related read on gentle damp solutions for an old house helps you set the client’s expectations.
The site visit: mapping the damp house before the works programme
The technical survey for a major renovation is the one point where everything is still open: budget, trade order, choice of materials. Give part of it to the walls.
Spotting the affected load-bearing walls
Walk every room on the ground floor and note the load-bearing walls that show a damp band at the base, white deposits, or render that’s crumbling. Non-load-bearing stud partitions, however, don’t fall within the treatment.
Matching each mark to its cause
- a fairly sharp horizontal line at the base of a load-bearing wall means rising damp, which you then treat in the masonry;
- marks higher up, cold corners, mould in winter: condensation, a ventilation and heating issue;
- a localised patch that worsens after rain: a leak, a waterproofing issue (roof, façade, windows, guttering).
Checking for sealed finishes and sources of water
Cement render, non-breathable paint, bonded tiling or stud walls at the base of a wall all block evaporation. Outside, besides, check the gutters, downpipes, drains and the slope of the ground.
Preparing the treatment
Measure the distance between the dampest point and the furthest affected wall. Also check the power supply: you need an earthed socket, live at all times, that no switch controls. Finally, mark the maximum height reached by the damp with a dated pencil line: this reference point will guide the whole job.
The schedule for renovating a damp house: water first, wall bases last
Step 1: strip and clear the base of the walls
During demolition, remove anything acting as a barrier at the base of damp load-bearing walls: stud partitions, cement render, sealed paint, bonded tiling. This strip-out, in fact, sets the pace of drying.
Step 2: install the treatment from day one
Fit the polarity inverter as early as possible: low on the load-bearing wall, facing the dampest section, in direct contact with bare masonry and clear of any corner. Every week gained here counts: improvement generally takes 18 to 24 months.
Step 3: fix water ingress on the façade side
Besides, get your roofer or bricklayer to sort out gutters, downpipes, drains and slopes, alongside the building’s weatherproofing.
Step 4: run the technical trades and upper areas as normal
Electrics, plumbing, external joinery, ceilings and the upper parts of the walls proceed as usual. Meanwhile, only the treated wall bases stay bare.
Step 5: finish the wall bases last
After several months with the wall exposed, close it up with vapour-permeable products: lime render, breathable paint. Warn the homeowner: as the wall dries out, salts migrate to the surface and it may look whiter for a while.
If the client wants to move in sooner, offer a two-stage handover: everything finished except the treated wall bases, completed at a visit already booked into the schedule.
Coordinating the trades when renovating a damp house
On a job with several trades on site, someone who doesn’t know what the device does can unplug it, cover it up or move it. Give everyone written instructions:
- plasterer: no stud wall between the device and the masonry, and a cut-out left at its position;
- electrician: the socket feeding it stays earthed, permanently live, never controlled by a switch; if one needs installing, that’s their job;
- painter and renderer: no sealed product at the base, breathable finish once the waiting period is over;
- every trade: the device runs continuously and stays plugged in for the whole length of the job.
Mark its location on the working drawings and in the file handed to the client at completion.
The treatment package for a damp house: model, pricing and sourcing
Choosing the model based on distance
Measure the reach needed, in metres, from the chosen fitting point to the furthest damp wall: this length, not the floor area, determines the model:
- ATE LC15: 15 metres of coverage;
- ATE LC30: 30 metres, the most common choice for a single-family house, also available as the ATE Pulse in a modern design;
- ATE MAX: 60 metres, built for large properties, older buildings and blocks of flats;
- ATG LC30: 30 metres, self-contained with no electricity, for use only where no permanently live earthed socket is available.
Positioning pitfalls are covered in detail in the site installation guide.
Pricing it and getting equipped
List the treatment as its own line item: supplying the device, fitting it, stripping the finishes at the base of the wall, exterior repairs, and finishes carried out later. The sales arguments are set out in our article on including damp proofing devices in your renovation quotes.
On the sourcing side, Help Humidité Pro (a subsidiary of Humidistop) reserves ATE and ATG devices for professionals: registration takes two minutes with your company registration number, and unlocks trade pricing straight away, with volume discounts, single-unit orders available, free delivery within 7 working days, and payment by bank transfer or PayPal. The devices carry a 10-year manufacturer’s guarantee, and the explanatory sheets provided round out the file you give your client.
Frequently asked questions
Where do you start when renovating a damp house?
With a room-by-room diagnosis of where the water is coming from, followed by treating the rising damp and clearing the base of the walls. Finishes come last.
Do you need to wait for the walls to dry before starting work?
No. The treatment starts with the job, and any trade that doesn’t touch the wall bases can run alongside it. Only the finish on the lower sections waits several months.
Does the treatment also deal with leaks or condensation?
No. The polarity inverter treats rising damp. Waterproofing or ventilation deal with leaks, flooding and surface mould instead, under other parts of your contract.
What should you hand over to the client at completion?
The device’s location, its installation notice, the 10-year manufacturer’s guarantee, a photo of the dated reference mark, and the schedule for finishing the wall bases.
Where do you order devices for renovating a damp house?
From the Help Humidité Pro shop, once you’ve opened a trade account, which is approved instantly.
In summary: renovating a damp house
Renovating a damp house means reversing the usual habit: water first, finishes after. Diagnose during the site visit, strip out the wall bases, fit the polarity inverter from day one, correct the water ingress, give the trades written instructions, then apply breathable finishes after several months. To turn this know-how into a new revenue stream: diversify your business as a building tradesperson.


